Monthly Archives: September 2015
Brief update on gypsy wagon / tiny house construction
Back on September 4, I shared photos of the beginning stages of constructing a gypsy wagon or tiny house. As a next stage in the planning and design, our master craftsman put together mock ends to help the owner determine the window sizes and locations.

The feel of being inside them was very real. Because the side ‘windows’ were movable, they got rearranged for the best views on this river property.

It may have taken a little time to go through this exercise, but I think it was worth it to gain an end product that everyone will be happy with.

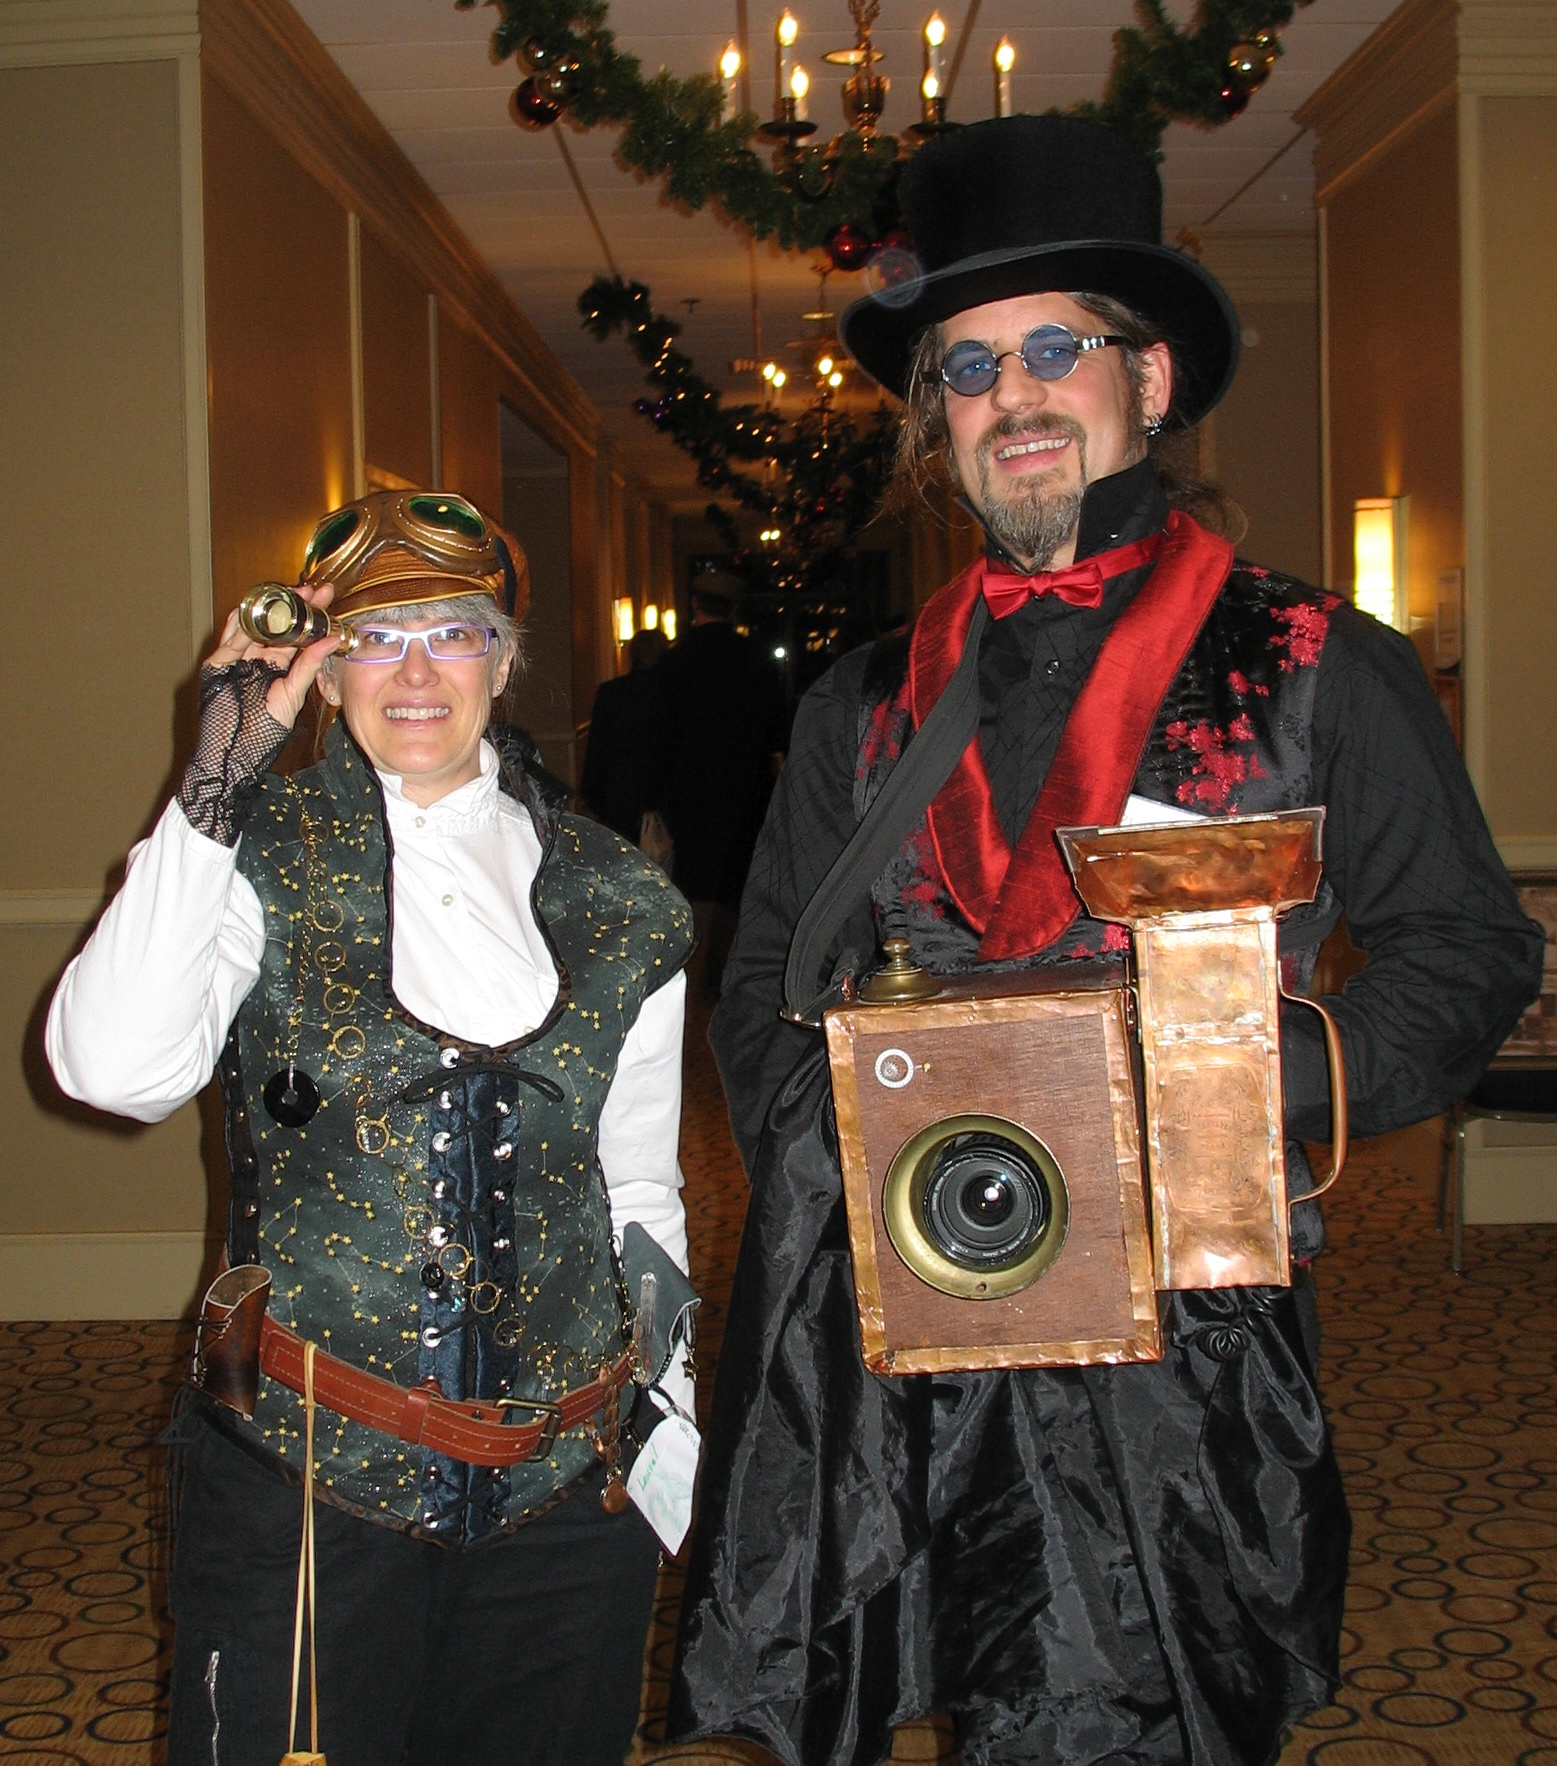
And here’s my Victorian costume put together!
Ta-da!

Laurel Wanrow, photo by Kimberly Shorter, BBF photographer
I think my outfit came together pretty well. The most fun I had was watching my fellow writers do double-takes upon realizing who I was. Replacing my regular glasses, with their square purple frames, sure made a difference, not to mention just dressing up for a change.
 I could not keep my short hair pinned, and when I mentioned this (the Victorian fax-paux of having my hair loose!) on Facebook, fellow author Rowan Worth who does Civil War reenacting suggested a snood, and thankfully included this Victorian hair snood link! Basically, it’s a hair net, and Mrs. Button’s Vintage Corner did this accessory justice in her article ‘In the mood for a snood.‘
I hosted at the information table for the Maryland Romance Writers’ tent, but also listened to several panel discussions.

And also had a fun day hanging out with author friends, including fellow indy-publishers Rebecca Rivard and Leslye Penelope.

The event continues through Sunday, Sept 27, and Maryland Romance Writers is hosting a full schedule from 11 am to 7 pm each day.

Another highlight for me, as a self-published author whose books are POD rather than available in bookstores, was seeing my print copies shelved with others in the book sales area.

More photos are at the Maryland Romance Writers Facebook Album Baltimore Book Festival 2015. Thanks for sharing my costume crafting journey!
Dressing up like a Victorian lady, Part 4: Reticules and other ways to carry things
Let’s face it, we are a society that totes things. To attend the Baltimore Book Festival dressed like a Victorian lady, and still have all my ‘necessities,’ I needed a reticule. In other words, an era-appropriate purse.
My research led me to a timeline of purses titled Please Don’t Ridicule my Reticule! by Joan Kiplinger on a fabric website. (I’m seeing a trend here linking sewing and costume-making!) The descriptions and many illustrations led me to pulling out an unused crocheted doily belonging to my grandmother. I began fashioning a velvet interior, thinking I’d close it with ribbons and decorate the edges with beading…
However, I am wearing a riding skirt and hat. Plus, between the two choices of boots I showed in my ‘Part 1’ post, I have preferred the brown ones. They may look more like work boots, but that fits the riding skirt and image of landowner Mistress Constance Gere. And they bring together the brown belt, accessories and leather gloves I have gathered. I began scanning through images of reticules and came across this fashion plate, again from the Kate Tattersall website. You go, R. S. Fleming!
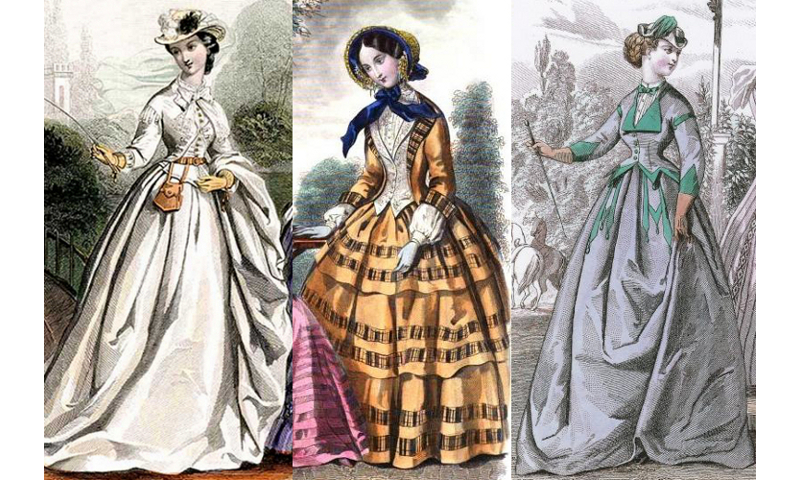
The plate illustrates the author’s Victorian Fashion Terms: Reticule. It’s captioned: “Stunning white riding habit with a cutaway jacket and leather reticule 1863.”
Exactly what I needed!
I did quite a bit of leather work in high school and have sewn since, so it was easy for me to make a paper pattern and dive into a box of materials my mother saved and gave me to use with my kids. I liked the shape of the reticule in the fashion plate, so copied it best I could. Here is the process.
After tracing pattern on underside of leather and cutting with an exacto knife (We don’t seem to have the leather scissors anymore), I punched holes along the edge and began lacing the pieces together with a flat leather needle.


The front and back are matching shapes sewn to 5 cm wide strip. Note You need to make it longer than the actual side length to give the corners room to turn. If I have made a simple U shape, i wouldn’t have needed the extra holes. Luckily, I had room to add them as I sewed.
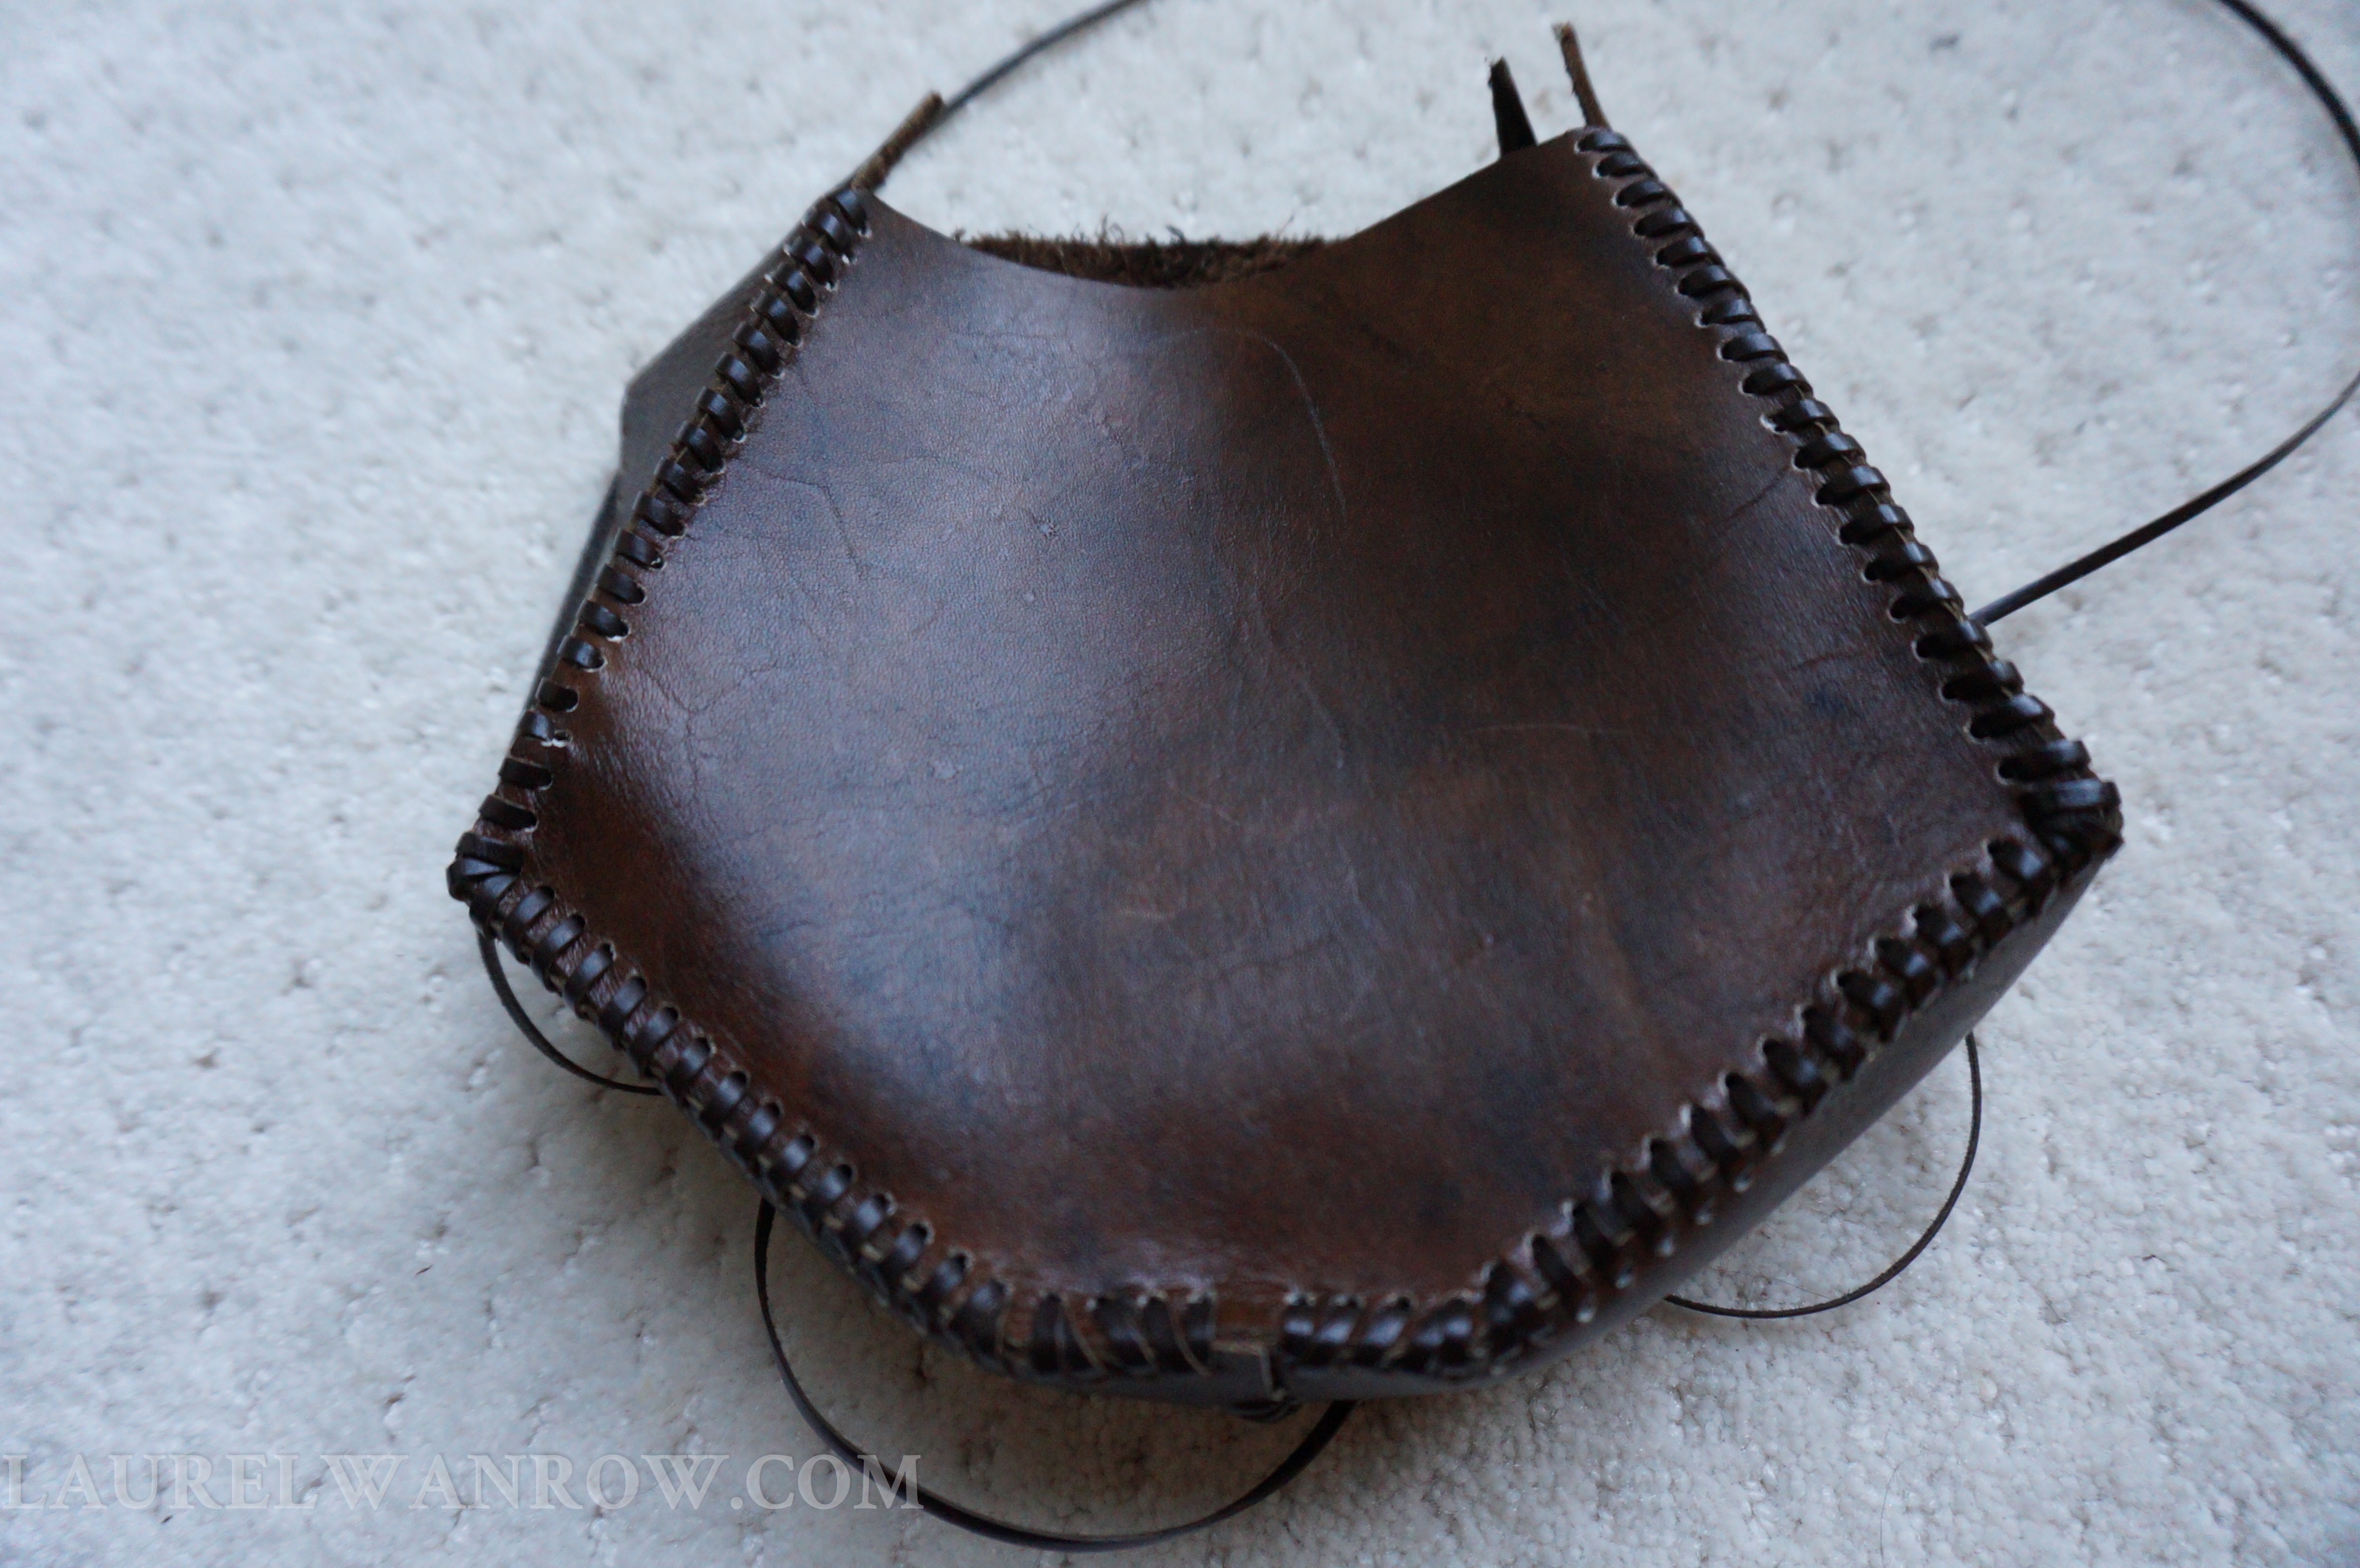
The reticule is designed to hang from a belt. Before lacing one the flap to close the top opening, I made two strips the right length, and laced a loop at the top of each. They were then sewn into the back through two sets of holes.

My worst dilemma was finding a closure. Some options were sewing on two wooden buttons to lace a piece of cord around, or creating a peg in a leather loop fastener. I wanted something more personal…and it had to be done quickly because I am running out of time before the BBF event tomorrow. I looked around the house…and found one of my stone Zuni carvings had a pinched belly, perfect for looping several rounds of waxed string with beads and a piece of leather lacing.

I added a piece of leather on the back of the flap where I threaded the lacing to hold on the carving, so its weight will not pull at the single leather.

I made a simple loop strung through two bottom holes to secure the stone animal. I would like to braid a more substantial piece and also trim the flap edge with a line of lacing, but I have no more time to punch holes or figure out circular braiding–which I hope I can purchase!
My reticule will work well for my smaller items, such as my keeping my real glasses handy.

But it’s always handy to have other containers for things, ones that are still Victorian-era appropriate–meaning natural materials and handmade. I grabbed a small crocheted bag made by a friend to hold my cash.

My brass compass already lives in a leather pouch, easily found if you visit out west. I added the gears (actually a button) for a more steampunk look.

For larger items, I’m taking a basket that looks old because of its rustic construction.

I’ve lined it with an embroidered table cloth I never have out, but will be nice to see for a few hours. it was made by my great-grandmother, and will hide my water bottle and a few snacks.
Lastly, I believe I will take along a small purse my grandmother gave me that was her mother’s. I believe that puts it in the 1880-1890s.

I’m not sure if it’s alligator or crocodile, but that coin purse has some wicked claws on it! And now, I believe my Victorian costume is complete. Here is the Maryland Romance Writers stage schedule at the Baltimore Book Festival. Hope you can join us this weekend.
I didn’t notice until I hit publish, but this is my 200th post for my website! Thanks for joining me.
Dressing up like a Victorian lady, Part 3: Jewelry and such
Now we arrive at the minor accessories for trying to present a historical look. Isn’t it the details that make an image?
I feel one of the most noticeable details some of us need to grapple with is eye wear. Unfortunately, it’s also an expensive one. I cannot see without glasses, and my current ones are purple–not a Victorian look. Serious reenactors have their prescriptions put in the correct frames, from companies like the Historic Eye Wear Company.

Eye Wear Frames from the Historical Eye Wear Company
Thankfully, I saved my old metal rims which are close enough.

We’ll see how I feel about that long-ago prescription at the end of the day!
Next on my list was jewelry. A wonderful article, Getting a Clue About Accessories from Historical Sewing.com, set me straight on a number of items, including earrings. During the Victorian era they hung on wires and were made of natural materials.
Wires…wires…I have mostly posts, but found a pair I haven’t seen in years.

I bought these beaded porcupine quill loops from a woman who volunteered while I was a summer seasonal at Coulee Dam National Recreation Area. She was a Native American member of the Colville Reservation, and had handmade them in a traditional style…or so I was told. Can’t verify that, but I figure porcupine quills fall squarely into natural materials. Though the mammal was not native to Britain, the ‘colonies’ had them. Wouldn’t people have been fascinated enough by the quills to import and use them in jewelry? In more recent times, the 1970s, a few porcupines did escape museums in Britain and establish themselves.
Among ideas on Historical Emporium, I learned that a cameo would be appropriate. I went searching my jewelry chest for a cameo my aunt brought back from Italy for me. I found it–on the left–and a second, larger one.

My husband’s grandmother bought it for herself sometime between 1910-1915 (kept a reminder note with it). That struck me as probably the oldest piece I would find…and then I found a locket I had forgotten about, one that had belonged to my husband’s mother.

The accompanying note gives the history: “This Locket was given to Jean when she graduated from Ferry Hall (a girls boarding school) by her Godmother, Hazel Oswalt. it was purchased at the Caledon Market, London. Made in Victorian England c 1880.”
All right!
Two other small items I’ll carry were purchased from a steampunk vendor at Balticon for my steampunk costume–which, I forgot to mention during part 1, is an astronomer costume. They are appropriate for the times and things a landowner like Mistress Gere would have and use.

A brass compass

A spy glass that fits in one’s hand. I fashioned a belt holder for it when I put together the astronomer costume.

Showing this leather work leads into a hint of what I’ll present tomorrow–hopefully

I have some work to do to complete it…and only two days until the Baltimore Book Festival!
Dressing up like a Victorian lady, Part 2: Acccessories
Dressing properly isn’t just the clothes; the accessories must be right to make a correct historical presence. I have a few more things to prepare for my Victorian costume to be ready for the Baltimore Book Festival.
Anyone and everyone going out of the house in Victorian times wore a hat. During the time The Unraveling is set, men wore top hats, boys and working people might wear caps. Women had more choices in head wear, from ruffle-, ribbon- and bead-decorated silk, cotton or felt, to plain straw and cloth bonnets. I took a few liberties with hats in my more casual hidden realm, but decided my costume would be incomplete without a hat. Along with my blouse and split riding skirt, I bought my hat from Historical Emporium. A riding hat.

I figured that fit, but I’m worried how that trailing veil will hold up.
No properly-dressed Victorian adult went out without gloves. Again, because my characters live and work on a farm, I took liberties and forgo gloves except when they are in the Derby. However, like the hat, I decided I needed them…unfortunately after I had placed my order. It’s darned hard to find plain leather dress gloves these days. I considered using my lace fingerless gloves from my steampunk costume.
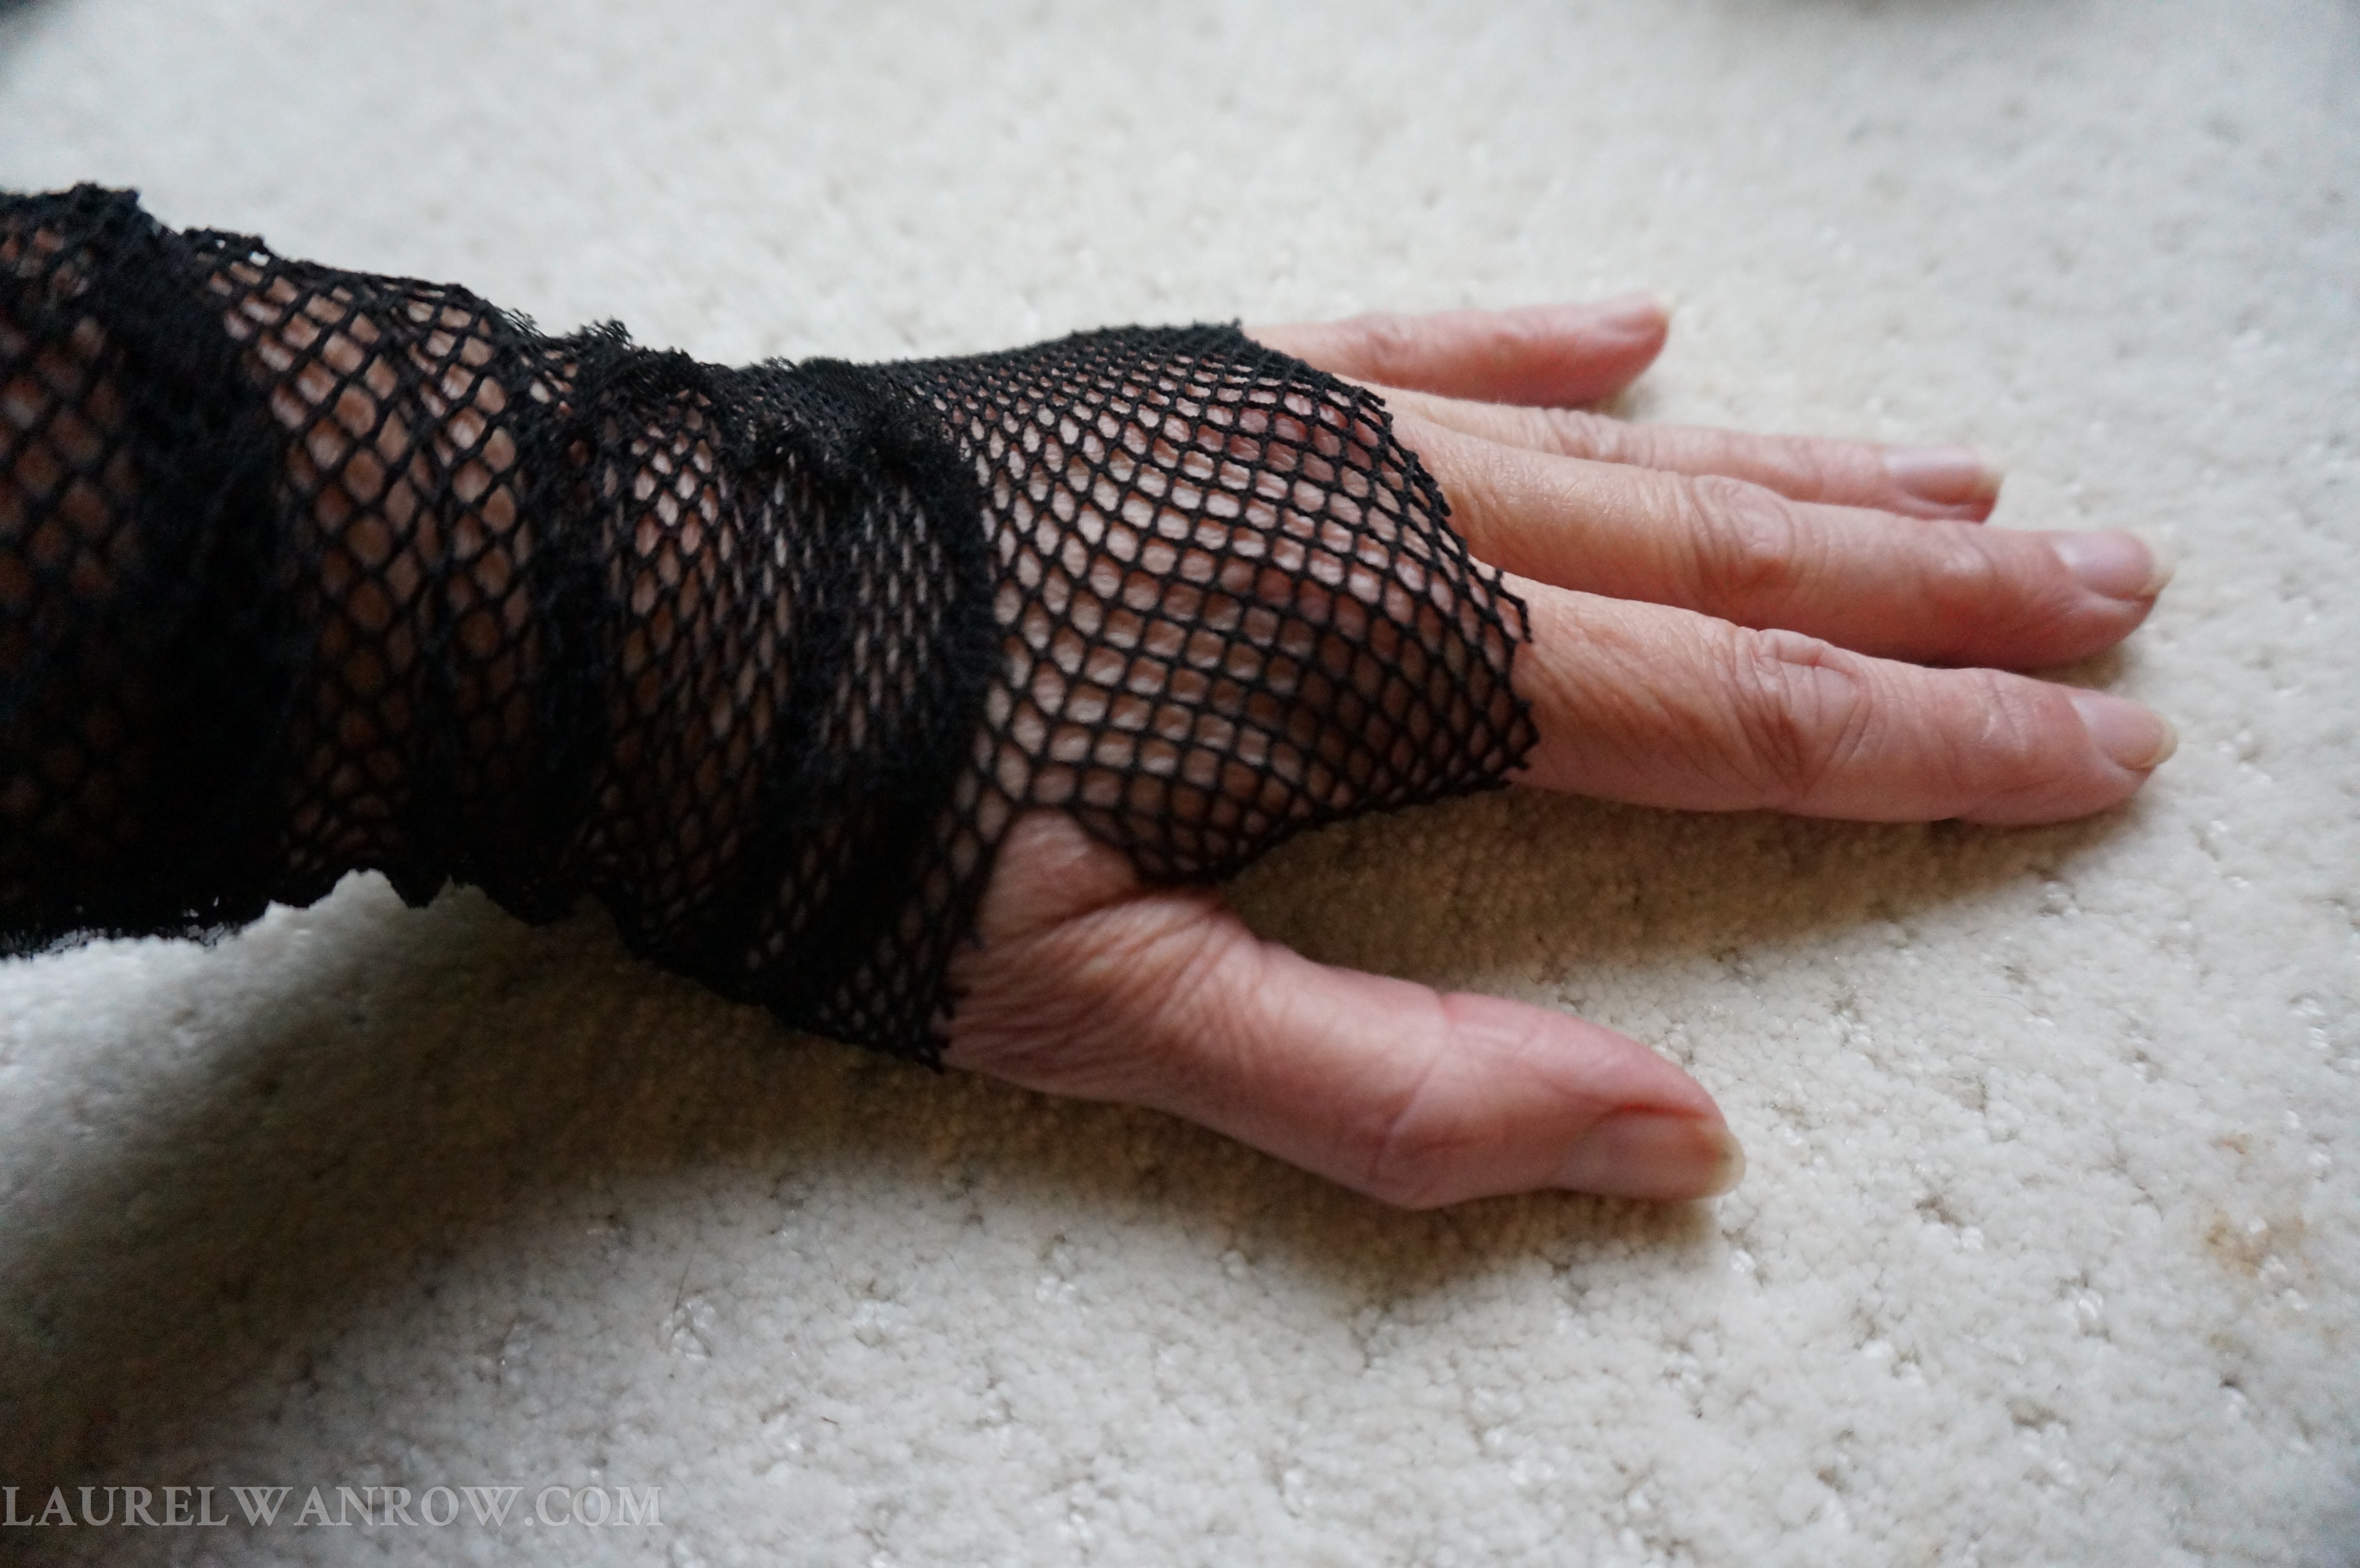
I could wear a ring with these, but frankly, they don’t look right. Another option is cutting down a thin pair I found in the Halloween section, or wear a fleece lined pigskin pair I have from long ago.

Not quite the right color since most of my outfit is black. Tomorrow I’m calling around to try to borrow a pair.
I needed stockings to wear with my boots. But what kind? A search of Victorian stockings turned up Kate Tattersall‘s (Victorian Adventuress Extraordinaire!) fabulous website. In addition to Kate’s adventures (due out in January 2016), author R.S. Fleming has posted many well-researched articles, including on silk hose, colourful stockings & socks. From this essay, I learned stockings are the longer ones–up to the thighs–and socks the shorter. I decided knee length would be appropriate, a knit style in wool. I was dreading spending too much more money at REI, where I know knee high wool socks are plentiful, but Target is closer and I found both thin and thick versions for half the price.

I’m leaning more toward wearing the brown boots, but need to have a trial period of walking around the house now that I have the socks!
Dressing up like a Victorian lady
When I first decided to attend the Baltimore Book Festival, I also decided to dress Victorian, the era my series The Luminated Threads is set. I already knew it’d be fun because I put together a steampunk costume for a RWA conference a few years ago.
But that was fantasy and easy–I could collect up and wear anything I liked, which I did and won second place in our fantasy chapter’s annual contest. Putting together a Victorian look involves more preparation than going to your local retailer or party supply store, and this time I wanted to be a bit more correct…but not completely correct. I only had the funds to dedicate to what people would see, not the underthings. If you want an entirely correct version of dressing Victorian, please see Victoriana Magazine’s How to Dress 1860s.
Also, I wanted to dress like a character from my 1868 series, but not the heroine. Annmar enters the story wearing a mourning outfit, and one more formal because she works with business clients, drawing advertisements for their steam machines. Because I’m more of a jeans and t-shirt wearer, I chose to dress like the owner of the farm Annmar goes to work for, Mistress Constance Gere:
A woman strode along an avenue created by rows of fruit trees. She was tall, her lean figure dressed in the style Mrs. Rennet wore, a ruffled blouse topped by a suit vest styled for a lady. But unlike Mrs. Rennet, this lady had on a split skirt, the kind worn by women who rode horseback. She would most certainly be holding a sword when she rode—
I’d seen this split skirt online in Historical Emporium. I’ve trolled their site along with other research sites, and they seem the most reasonable and easily accessible, unless you go to a con or DIY. Also because of finances and figuring out what I want to do in the future, I decided to reuse my vest-style corset. The black Brush Twill Riding Pants would work perfectly. Unfortunately, even though I carefully took measurements, the size was too big, so a replacement is on the way. They seemed sturdy and not too long, which was a concern because I am only 5′ 4″.
 The blouse was a simple decision: The Victorian Ladies Blouse in white.

The collar is the correct stand up one, the sleeves are nice and full. I like the fabric and the fit.
Boots…my old ones looked and felt great, but the sole cracked after only a half-dozen wearings. I ordered the Victorian Ankle Boot, tried them on–they fit fine–and my husband said, “What are you thinking? You’re going to sprain your ankle. Again.” Uh, right. I do have a issue with weak ankles and lengthy sprain recovery. And getting around any festival or conference is no walk in the park.

But they’re so cute. sigh.
With a week to go, I was running out of time. I scoured the internet for likely substitutes with Victorian low heel boot and found Payless had something that would do, and in stock locally! I ran over and voila:


Now I have a decision to make. The black boots will likely go unnoticed under the black riding pants. However, Mistress Gere is a farm owner and likely to be wearing rougher work boots, the kind Annmar sees the other farmworkers wearing:
“May I borrow a pair of those boots in the back hall?”
“The Wellies?” Mary Clare frowned. “They’d be huge on you. Try my work boots.” In a thrice, she had them off.
Annmar laced the leather boots and stood. These fit better than the ones last night. And walking— “Much less sloppy,” she told a grinning Mary Clare. Her sore feet and the rough ground slipped from Annmar’s mind a few steps into the orchard.
I also envision Mistress Gere needing to carry a few items out to the fields, which would be much easier if she wore a belt and hung things from it…clearly I have more work to do this weekend!
Learning how to add a link using my book cover
I often follow up on readers who comment on my blog, checking their blogs to see what they are up to. One recently was Ana Spoke, who has been posting about her debut release, Shizzle, Inc. Ana has offered many tips for we newbies, including how to post your cover on WordPress blogs with a buy link embedded. See right over there ——> 🙂
Visit Ana’s quick instructions for adding a link to Amazon. I have a small addition because, being a Luddite, my first attempt at adding my cover image failed. My ‘Kindle’ cover image is very high resolution. When I put its media Image URL into the widget box, I got a huge, only-seeing-one-edge view of my cover. I went back to my image widget dimensions and tried to set them at zero, but it didn’t work.
Instead, I made a new image copy and used the preview program tools to adjust the size to 2 in wide.

 The program scaled the cover proportionally, and then when I switched to pixel view I was able to grab the dimensions (144 x 223).
![]() I popped them into the widget’s width and height boxes and everything worked!
I popped them into the widget’s width and height boxes and everything worked!
And on to the next weekend…
I wanted to share a few photos of my adventure with helping on the construction of a gypsy trailer…or tiny house, as they are being called. But the week has flown by with the pics off the camera at least, but not into the world. I have however, gotten through my copy edits on Volume Two of The Luminated Threads, and seen the second mock-ups of the cover art! So exciting week for me.
Here’s the short version on the gypsy wagon… and the photos if anyone is interested in the step-by-step process of construction, like I am. A group from church is working on two of these tiny houses on a lovely river property.


One gypsy wagon purchased by the landowners is already on the floodplain property. It’s a nice way to ‘camp’ at short notice and still be close to nature.

The property floods, so the solution to having sleeping ‘cabins’ available for a few folks who might not be able to tent, is to have portable structures that can be moved when–when, not if–a flood event occurs.

This was not the first workday. The army surplus wagons are already set up and a deck built between them. The flooring was laid down last spring with hardware cloth rodent prevention and foam insulation.


Our goal for the one workday was to frame in the three sides of the beds with studs on 16 inch centers, and prepare a level surface for an overhanging edge to widen the inner dimensions a bit. The trailers still have to be a width to be transported on the highway to higher ground.


One wagon had side supports that needed to be worked around by cutting notches with a jigsaw–a little detail which required a lot more measurign and cutting. Something to keep in mind if you have the option to choose a wagon style.

The extension boards fit nicely around.

We finished mid afternoon and were able to enjoy the evening on the river.

We have a creative crowd, both for construction and meals!

Hope I’ve given you a few takeaway hints!